How to Make, Save, Download and Delete Twitch Clips
Twitch clips are really helpful methods to record and share memorable moments from live streams or VODs. Whether you’re a viewer or a streamer, creating clips lets you quickly highlight all the important moments. Twitch has always provided easy tools to make and save clips right on the platform.
Although saving clips is done automatically once you’ve created them, it’s left to third-party tools to perform the actual download process since Twitch doesn’t provide a direct option to do that. They will enable saving clips to be able to use them offline.
Additionally, If you prefer uploading pre-recorded content rather than live streams, make sure you’ve set up your recording properly. Our step-by-step guide on how to record on Twitch walks you through the entire process to ensure high-quality videos.
Making, saving, downloading, and deleting clips on Twitch is pretty much something straightforward, but somehow under some bounds and steps that need to be done. Here are details for each of these actions:
Table of Contents
How to Make a Twitch Clip
Today, capturing memories and sharing them on Twitch with one click is convenient when recording memorable moments from live streams or broadcasts. Moreover, Clips help viewers and streamers draw attention to exciting, funny, or important moments in just a few clicks. See how it’s done!
Twitch Website through Desktop
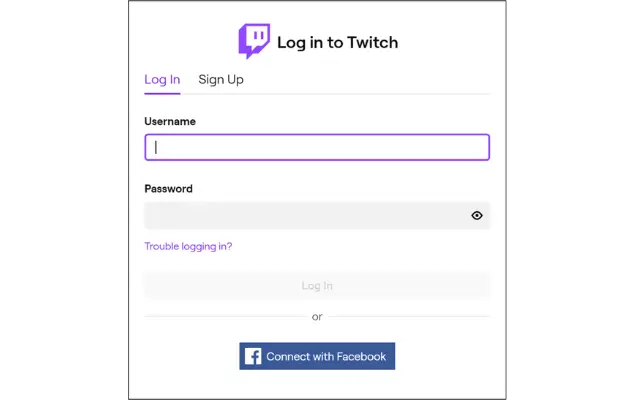
Log in to Twitch: Go to Twitch. tv and log in using your account.
Locate Your Stream or VOD:
- To take a clip off of a live stream, navigate to the one you are viewing.
- To cut from a re-air, you will need to head to the “Videos” page of that channel and find the VOD of the stream you wish to clip.
Access the Clip Maker:
If in Live Stream: Position your mouse pointer over the video player. There should now appear a “Clip” button, an icon of scissors, in the bottom-right corner of the player .
If in VOD: Click the “Clip” button in the toolbar of the video player
Creating the Clip :
You will now receive the Clip creation tool. Using this slider, you can select the start and end of the clip.
Clip length: Up to 60 seconds.
Save the Clip:
Select the beginning and end points for your clip and then hit the “Save” button.
Moreover, You’ll need to give a name to your clip. Once you’ve done that, click “Create Clip”.
View Your Clip:
Once you have created your clip, you’re automatically brought to the page to see the clip, where you can share the link.
Using the Twitch App (Mobile)
- Open the Twitch app and log into your account
- Highlight the stream you want to clip.
- Tap the Clip button (scissors icon) while in the stream.
- Within a few seconds later, the clip will be generated and you can edit it – trim or save it.
Clips are great for highlights, but keeping your entire stream available for rewatch is just as valuable. Learn how to make your past broadcasts easily accessible by following our guide on how to save VODs on Twitch.
How Do I Save a Twitch Clip
The clips are automatically saved to the Twitch account by default. However, It can be accessed in the Video Producer section. To access as well as manage your clips.
Using Desktop;
- Open your Twitch website.
- Top right on your screen, click profile
- Choose Creator Dashboard
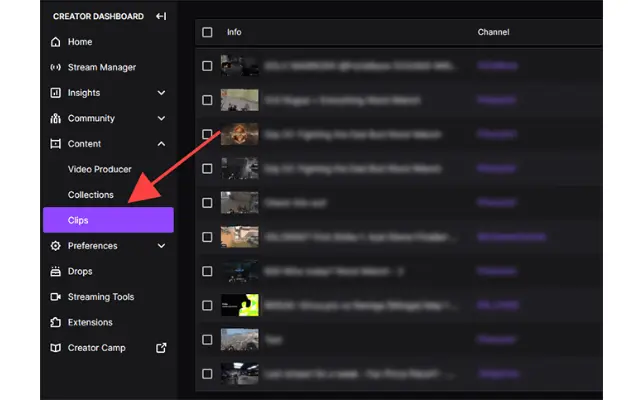
- Left-hand sidebar Content > Video Producer
- Below the Clips tab, you will get all the clips made until now
Here you can edit, download, or share the clips
On Mobile:
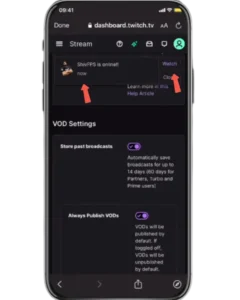
- Open the Twitch application and sign in
- Click on your profile icon.
- Navigate to Videos or Video Producer.
- Tap the Clips section to view your clips.
How to Download a Twitch Clip
Twitch does not have a feature that you can download clips directly, though you can do the following for downloading with the following method:
Desktop
- Video Producer
- Click on your Video Producer and go according to the above step.
- Choose your clip.
- Click on the clip to open.
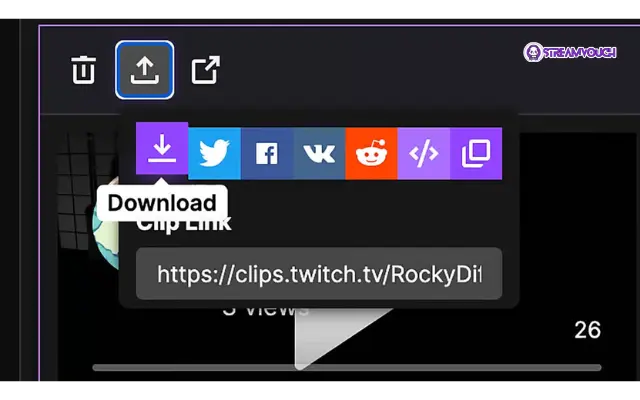
- Right-click on the video at the clip’s video page and select “Copy video URL.”
- Paste the URL into an online Twitch clip downloader.
Mobile:
You cannot directly download clips from the mobile application, at least not easily. You’ll need to use a third-party site or service as on the desktop:
And if you’re planning to keep streaming instead of deleting clips, having the [best OBS settings for streaming can make your broadcasts run much smoother.
How To Delete A Twitch Clip
Deleting a Twitch clip is very easy if you no longer want to retain a certain highlight. Whether it’s your very own stream clip or a clip that someone else created from their stream, you can easily delete them from your Video Producer.
In this regard, creators of their clips have the ability to manage through Twitch, thus giving them the opportunity to delete unwanted clips whenever they want. All it takes is following a few steps, and it will seem like a walk in the park to remove that Twitch clip.
And if you’re planning to keep streaming instead of deleting clips, having the best OBS settings for streaming can make your broadcasts run much smoother.
Desktop
- Open the Twitch homepage and log in
- Click the profile icon on the right-hand top of the page and select Creator Dashboard
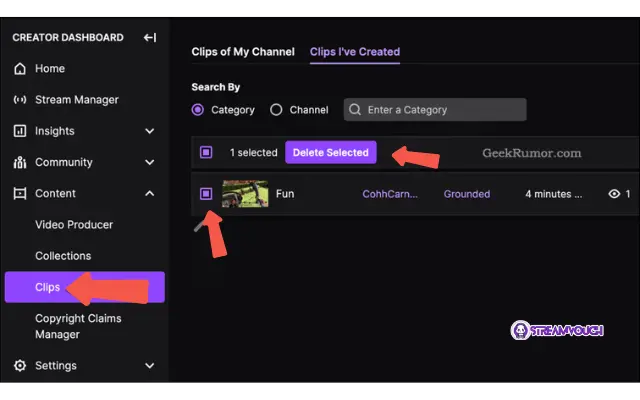
- On the left, you will find Content > Video Producer.
- Click the tab Clips
- Locate the clip you wish to delete
- Click on the three dots (ellipsis) next to that clip
- Select Delete and confirm
Mobile
- Open the Twitch App on your mobile and log in.
- Open your profile icon and go to Videos or Video Producer
- Tap on Clips. This opens that section
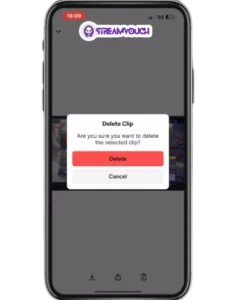
- Find the clip you want to delete, tap on the three vertical dots
- More options
- Tap Delete and confirm
Important Notes
- Clip Length: Clip length for Twitch is limited to 60 seconds.
- Clip Retention: Clips are permanently kept on Twitch unless the clip maker deletes them.
- Download Clips: You cannot download a clip if you’re not the original owner. You should ask for permission from the original owner or download via a third-party tool.
FAQ’s
How do you make a clip for Twitch?
Just click the Clip button–that is, the scissors icon when watching a live stream or VOD. The Clip panel will open, so you’ll be able to trim the start and end points of a clip (up to 60 seconds); then click the Create Clip button, which saves it.
Where are my saved clips?
Clips save automatically to your Twitch account. You can access them through the Video Producer area on both the desktop and mobile versions of your profile.
Am I able to download my Twitch clips?
No, direct download is not possible from Twitch. You can, however, still download using third-party tools – such as Twitch Leecher or Clipr – by copying the URL for your clip and following the download instructions from the respective sites.
For how long are Twitch clips saved?
Twitch saves clips indefinitely unless you delete them. The platform keeps VODs based on your account status: 24 hours for regular users and 14–60 days for Twitch Partners, depending on the settings.
How do I remove a Twitch clip?
Clip You delete a clip by accessing your Video Producer in Twitch, where you search for the clip you want to delete, then click the three dots (options menu) and then the option to Delete.
Conclusion
In a nutshell, making Twitch clips is a very easy and straightforward process. It allows you to capture live streams, as well as past broadcasts. Moreover, Clicking the “Clip” button allows you to easily choose your moment within 60 seconds. Once you save it, your clips are permanently added to your Twitch account.
Creating clips is just the start, the real impact comes when people watch them. That’s why some streamers explore options to increase clip views for greater exposure.
Sharing clips is one of the smartest ways to get your content in front of new viewers. If you want to take things a step further and build a loyal community, check out our in-depth guide on how to grow on Twitch.
In the video producer section, you can access all your saved clips, view them, and share them. However, you must use third-party tools to download a clip, since Twitch does not offer any built-in download options. Moreover, Third-party tools will help in saving clips to an offline location.
Finally, you can easily delete any clip you no longer need from the Video Producer page. Twitch efficiently captures and manages moments, but you must use external tools to download them.